Key Takeaways
- Applying homemade copper red dye is more about patience and preparation than complicated technique.
- Your starting hair shade decides how warm or deep the final copper red turns out.
- Skin staining and patchy color usually come from rushed prep, not from the dye itself.
- Aftercare in the first seven days locks in the warmth and prevents fast fading.
- Gentle washing, cool rinses, and oil sealing extend the copper red glow for weeks.
The first time I mixed a copper red paste in my kitchen and stood in front of the mirror with stained fingers, I realised something simple. The dye part is easy. The application part is where most of us slip. I had spent so much time perfecting the recipe in my earlier post that I almost forgot the real question, which is how you actually transfer that paste onto your hair without ending up with orange ears and uneven streaks.
This article is for anyone who already has their copper red mix ready and now wants the calm, careful application walkthrough. I am writing this from my own kitchen-counter trials, the messy first attempt, the better second one, and the rhythm I finally settled into. If you want the actual paste recipe, you can find it in my earlier post on preparing natural copper red dye at home, since this one focuses entirely on the application side.
Let us move slowly through it together.
How Do You Prepare Your Hair Before Applying Copper Red Dye at Home
Preparation is where the copper red colour either grips your hair beautifully or slides off unevenly. I learned this the hard way the first time, when I skipped the wash and wondered why patches looked muddy.
What You Need
- A mild sulphate-free shampoo
- A wide-tooth comb
- A clean towel you do not mind staining
- Sectioning clips or simple hair clips
- A little coconut oil for the hairline
- A pair of old gloves
Why This Can Work
Copper red pigments from natural pastes attach to the outer layer of the hair shaft. When that layer is coated with leftover oils, silicones, or styling products, the pigment cannot reach the strand evenly. A clean, slightly damp surface gives the dye something honest to hold onto.
Preparation
Wash your hair the evening before or two to three hours before application. Use only shampoo, no conditioner, no leave-in serum, no oil mask. Let the hair air dry until it feels just slightly damp, not wet and not bone dry. This in-between state can help the paste spread without dripping.
Exact Procedure
Detangle your hair gently from the ends, moving upward. Part your hair into four sections, two in the front and two at the back, and clip them away. Now take a small amount of coconut oil on your fingertip and run it along the hairline, the tips of your ears, and the back of your neck. This thin barrier may help reduce skin staining later. Avoid putting oil on the actual hair strands, since that defeats the whole prep.
What You Can Expect
Hair that feels clean, slightly damp, and easy to part. The strands should feel a little rough rather than silky, which is a good sign for dye grip.
Things to Be Careful About
Do not use a deep conditioning mask the night before, since heavy conditioners can coat the strands. Skip dry shampoo too. If you have any open scratches on your scalp, wait a few days before dyeing.
What Tools and Items Do You Need Ready Before You Start the Copper Red Application
Setting up your station before you open the paste bowl saves you from running around with dye-covered gloves later. I now keep a small tray ready every single time.
What You Need
- A non-metal mixing bowl, preferably glass or ceramic
- A tinting brush or a clean pastry brush
- A wide-tooth comb
- Cling film or a shower cap
- An old, dark coloured t-shirt
- A roll of paper towels
- A small bowl of plain water for quick cleanup
- A timer or your phone clock
- Two pairs of gloves, in case one tears
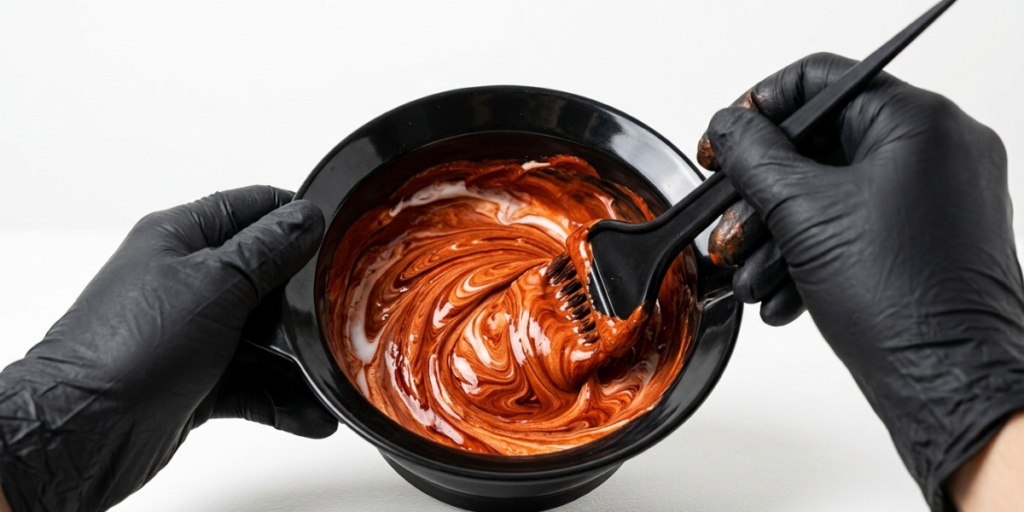
Why This Can Work
Copper red natural paste tends to oxidise and thicken when left sitting too long. Having every tool within arm’s reach means you can apply the paste at its freshest, which can help the colour develop more evenly across all sections.
Preparation
Lay out everything on a tray or a cleared counter near your mirror. Place paper towels along the floor edge if you are working in a small bathroom. Wear the old t-shirt before you even open the paste container.
Exact Procedure
Arrange the bowl in the centre, brush and comb on one side, and clips on the other. Keep the cling film unrolled and ready to tear. Set your timer app open on your phone screen so you do not fumble with dyed fingers later.
What You Can Expect
A calm, organised feeling once you start applying. You will not have to pause mid-section to look for a clip or wipe a drip.
Things to Be Careful About
Avoid metal bowls and metal spoons, since some natural dye ingredients can react with metal and shift the tone. Keep your phone in a clear pouch or zip lock if you plan to check the timer often.
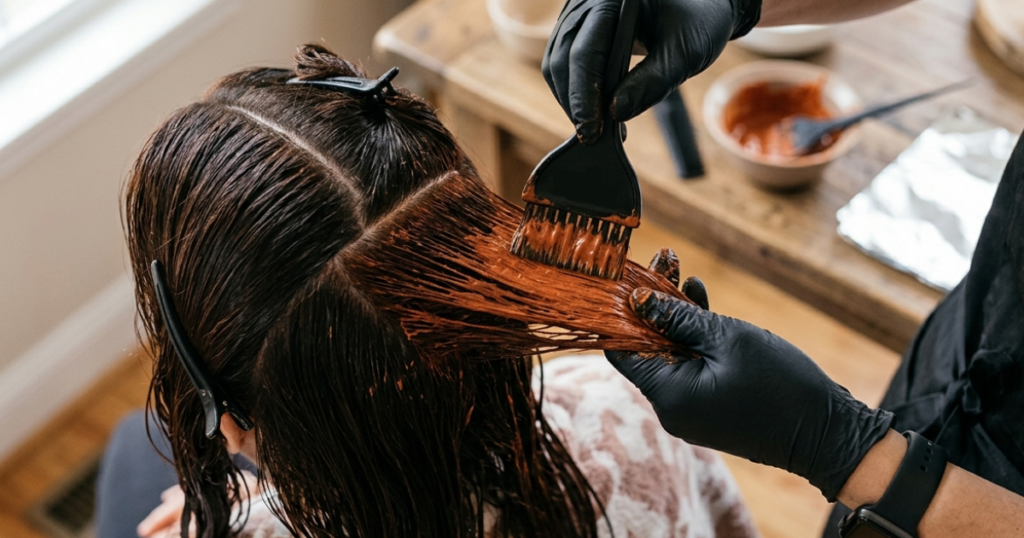
How Do You Actually Apply the Copper Red Paste Section by Section
This is the part where most home dyeing goes wrong, not because the paste is difficult, but because we get impatient and skip sections.
What You Need
- Your prepared copper red paste at room temperature
- The tinting brush and gloves from your tray
- The four pre-clipped sections of hair
Why This Can Work
Working in small, controlled sections allows the paste to coat each strand fully.
Preparation
Unclip one back section first, since the back of the head is usually the coolest area and benefits from extra processing time. Keep the other three sections clipped away.
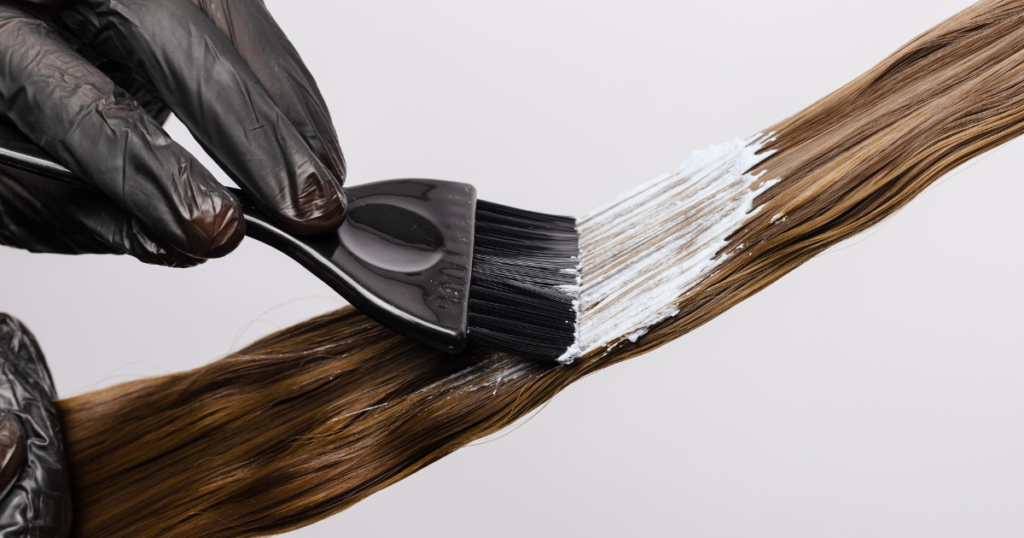
Exact Procedure
Take a horizontal sub-section about one inch thick from the unclipped portion. Dip the brush into the paste, load it generously, and apply from roots to tips on one side of the sub-section, then flip and coat the other side. Use your gloved fingers to gently squish the paste into the strand. Move to the next one-inch sub-section above it. Continue until that entire back quarter is coated, then move to the second back section.
Finish the two front sections last, since the front oxidises fastest and a survey on at-home hair colouring shared by Statista noted that home hair colour usage has grown steadily, which means more of us are learning these small sequencing tricks through trial and error. The front-last rule is one of those small tricks that may help.
Once all four sections are covered, gather your hair gently on top of your head and wrap it in cling film or tuck it under a shower cap.
What You Can Expect
A warm, slightly earthy smell and a heavy feeling on the scalp. The paste will look darker than your final colour, which is normal.
Things to Be Careful About
Do not rub the paste into your scalp aggressively. Do not pile dry sections on top of wet pasted sections, since the dry ones will not develop well. If paste touches your forehead, wipe it off immediately with a damp paper towel.
How Long Should You Keep the Copper Red Paste on Your Hair
Timing is the quiet hero of natural copper red dyeing. Too short and the colour barely shows. Too long and you may end up with a darker brick tone instead of a bright copper.
What You Need
- A warm room or a light scarf wrapped over the cling film
Why This Can Work
Natural copper red pastes release their warm pigment slowly. A gentle warm environment can help the pigment open up and deposit more visibly on the strand.
Preparation
Sit in a warm, draft-free spot. Wrap a soft scarf or an old towel over the cling film if your room feels cool.
Exact Procedure
For lighter starting shades like dirty blonde or light brown, keep the paste on for around one and a half to two hours. For medium brown hair, aim for two and a half to three hours. For dark brown hair, extend to three and a half to four hours. For very dark or black hair, you may need a longer session, often closer to four to five hours, and even then the copper red will read as a warm sheen in sunlight rather than a bright tone.
What You Can Expect
Your scalp may feel slightly tight and a little warm. The cling film may feel heavy. This is the slow part where you read a book, watch something light, or simply rest.
Things to Be Careful About
Do not exceed five hours, since longer does not mean better with natural pastes. Avoid heat tools like blow dryers directly on the cling film. If you feel itching or burning at any point, rinse it out immediately.
How Do You Rinse Out the Paste Without Losing the Copper Red Pigment
The rinse step is where many people accidentally wash out half the colour they just spent hours developing.
What You Need
- Cool to lukewarm water
- A mild sulphate-free conditioner
Why This Can Work
Skipping shampoo for the first rinse can help the pigment settle into the cuticle. Cooler water can help close the outer layer of the hair, locking the warmth in.
Preparation
Step into the shower wearing an old top. Have the conditioner bottle already open and within reach.
Exact Procedure
Rinse your hair under cool to lukewarm water, using only your fingers to gently lift the paste out. Keep rinsing until the water runs from muddy to lightly tinted. Now apply a coin-sized amount of conditioner, work it through, and rinse again. Do not shampoo today. Gently squeeze excess water with an old towel and let your hair air dry. Avoid the hair dryer if possible.
What You Can Expect
A vibrant copper red that may look slightly darker when wet. Once your hair fully dries, the true warm tone will reveal itself, often brighter the next morning after oxidisation.
Things to Be Careful About
Hot water can strip the fresh pigment fast. Rough towel drying can lift the cuticle and dull the colour. Do not use clarifying or anti-dandruff shampoo for at least a week.
What Aftercare Helps Your Copper Red Colour Stay Vibrant for Longer
The first seven days after dyeing decide how long your copper red glow lasts. This is where small habits matter more than fancy products.
What You Need
- A sulphate-free, gentle shampoo
- A light hair oil, like argan or sweet almond
- A silk or satin pillowcase, if available
- A wide-tooth comb
Why This Can Work
The hair cuticle stays slightly raised for a few days after dyeing. Gentle handling can support pigment retention. Cool rinses and light oils may help seal the cuticle and add shine.
Preparation
Plan to wash your hair only two to three times a week for the first two weeks. Keep your shampoo diluted with a little water for an even gentler wash.
Exact Procedure
Wait at least seventy two hours before your first proper shampoo. When you do wash, use cool water, lather only at the scalp, and let the suds slide down the lengths naturally.
Apply conditioner from mid-length to ends. After towel drying, warm two drops of oil between your palms and smooth them over the lengths, never the scalp. Sleep on a silk or satin pillowcase if you can, since cotton can rough up the cuticle overnight.
What You Can Expect
A copper red that stays warm and luminous for around three to five weeks, slowly fading into a softer auburn rather than disappearing in patches.
Things to Be Careful About
Chlorinated pool water can shift copper red toward a dull brassy tone, so wear a swim cap if possible. Direct strong sunlight for hours can also fade the warmth. Heat styling at high temperatures can strip pigment faster than washing does.
What Can You Expect Before and After in Terms of Visible Change
It helps to know what before and after really look like, since photos online can sometimes exaggerate results.
Before applying, your hair sits at its natural shade with no obvious warmth, often looking flat under indoor light. After applying, in daylight, you may notice a clear copper warmth running through the lengths, brighter on the ends if those were lighter to begin with. Indoors, the colour can look like a soft auburn glow rather than a loud red.
On lighter starting shades, the copper can appear bright and almost orange-leaning in sunlight. On medium brown, expect a rich, warm chestnut with red flashes. On dark brown, the copper shows mostly as a sheen that becomes visible only when light hits it directly. On black hair, the change is subtle and lives mostly in the way sunlight catches your hair.
Take your before photo near a window in natural light, and take the after photo in the same spot, same time of day. This honest comparison helps you see the real shift instead of guessing.
How Do You Prevent Skin Staining and Patchy Results
These two problems frustrate most first-time home dyers, but both are very preventable.
For skin staining, the coconut oil barrier along the hairline, ears, and neck does most of the heavy lifting. If paste still lands on your skin, wipe it off within a minute or two with a damp paper towel. Once dry, gently rub a cotton pad soaked in plain milk or a mild micellar water across the stained area. Avoid scrubbing with harsh cleansers, since that can irritate the skin without removing the stain faster.
For patchy results, the fix lies in three habits: thorough sectioning, generous paste loading on the brush, and squishing the paste into each strand with your gloved fingers. Patchiness almost always traces back to a thin or rushed application in one specific area, often the crown or the back of the head, where we cannot see well.
If you do notice patches after drying, you can do a quick spot application only on those sections after two weeks. Do not redo the full head right away, since stacking applications too close together can dry the strands.
Final Takeaway
When I look back at all the copper red attempts I have made, the ones I love the most were never the rushed ones. They were the quiet Sunday afternoons when I sectioned slowly, sat with the paste while the rain tapped the window, and let the colour take its time. Copper red, especially the homemade kind, is generous to people who are not in a hurry. The shade that ends up looking like it belongs on your head, not painted on top of it, is almost always the one you sat patiently with.
Try This Today
Before your next application, take ten minutes to set up your full station first. That single habit changed everything for me, and it may quietly do the same for you.
Frequently Asked Questions
Can I apply copper red paste on freshly oiled hair?
It is better to avoid oiled hair on application day. Oil sits on the cuticle and can block the pigment from reaching the strand evenly, leading to patchy or muted colour.
Should I dampen my hair before applying the paste?
Slightly damp hair can help the paste spread smoothly. Soaking wet hair tends to dilute the paste, and bone dry hair makes spreading harder. Towel damp is the sweet spot.
What if my hair feels stiff after rinsing?
A mild conditioner during the first rinse usually solves this. If it still feels stiff the next day, a light oil massage on the lengths, never the roots, can soften the feel within a day or two.
Can I sleep with the paste on overnight?
It is not recommended. Most natural copper red pastes deliver their best colour within two to five hours. Sleeping with paste on can dry out the strands and may not improve the final tone.
How soon can I wash my hair after the application day?
Wait at least seventy two hours before a proper shampoo wash. A quick cool water rinse on day two is fine if you feel sticky, but skip shampoo until day four.

- How to Dye Your Hair Purple at Home (and Actually Keep the Color) - June 22, 2026
- Cool Hair Dye Ideas for Short Hair That Actually Look Stunning - June 11, 2026
- Cool Hair Dye Ideas That Actually Suit Real Life and Real Hair - June 9, 2026